This post will show you how to make a hand-sewn child's face mask. In the image above, the child is wearing a face mask made on my sewing machine. Not everyone has a sewing machine no doubt! So this post will show you how to make the same mask just using a needle and thread.
There are many ways to make a face mask for sure and this is just one way. But it's easy and if you can thread a needle, you can do it!
Please note that no fabric face mask will protect you from viruses. They are too microscopic in size to pass through anything but a professional N95 mask. But, wearing a cloth mask on your face will help reduce the spread of germs when your child cough, sneezes, or speaks. Some protection is better than none, but please don't let a face mask lull you into the false sense of security that your child is protected. You still have to wash hands frequently, keep your hands off your face, and maintain a safe distance. Wash a face mask before you wear it and when you take it off. Don't try to microwave, etc....just wash and dry.
Supplies
2 Pieces of Cloth - 7" x 5" (100% cotton works best)
2 Pieces of 1/8" Elastic - 6"
Needle and Thread (Walmart)
You can buy 100% cotton fabric at Walmart, Michaels, Joann's, and other places for a hand-sewn face mask. You can even use an old shirt, pajamas or anything cotton. A cotton tee shirt will work, but it is harder to stitch through. Right now we have some fabric pieces on the website, but they may be sold out by the time you see this post: Patriotic Fabric
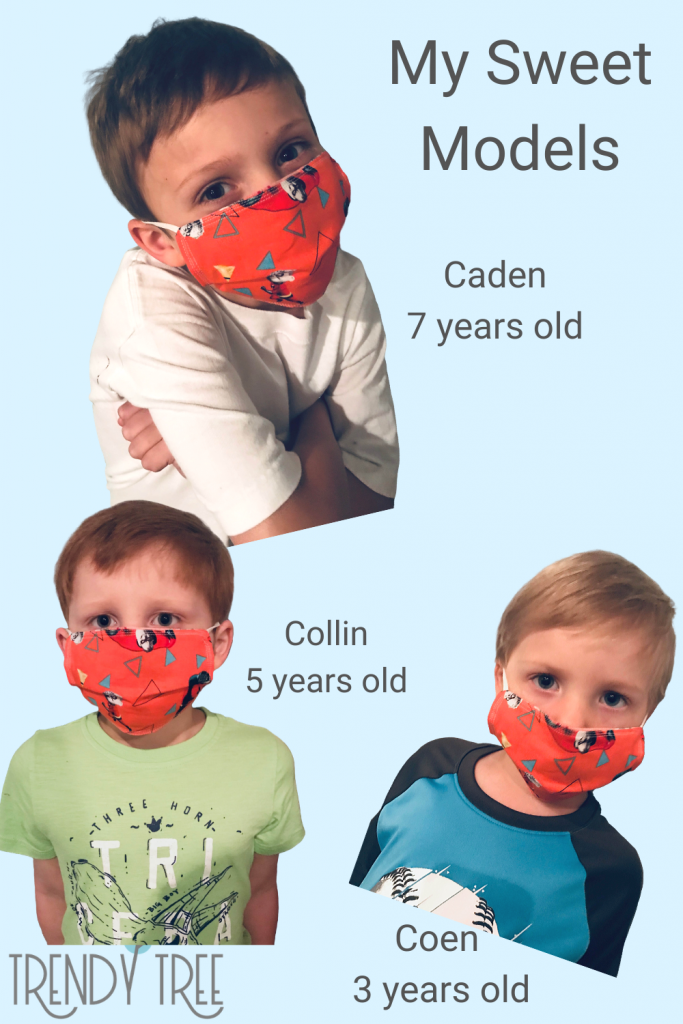
The length of the elastic can be adjusted for a better fit for your child. This hand-sewn mask fits my great nephews who are ages 3, 5, and 7. Not exactly a perfect fit, but adequate.
Ideally, the elastic should have been adjusted for each child. You could always short with shorter pieces of elastic (about 1/2" shorter) and go from there. Or, after the mask is finished, you could take up the elastic a little bit with a few stitches or even a small safety pin. They are wearing the machine-stitched face mask in the image below.
Press and Pin
Cut your pieces of fabric 7" x 5." You will need two pieces. You will also need two pieces of 1/8" elastic 6" in length. Press the fabric to make it easier to work with. You can wash it first if you prefer.
To make your hand-sewn face mask have a right and wrong side, start out by pinning the wrong side of one fabric piece to the right side of the other.
Needle & Thread
Choose a needle size that is comfortable for you. I prefer the size that is usually in the middle of the package. I also use a thimble to help push the needle through the cloth.
Being hand-stitching along the 7" side about halfway down the piece of cloth. Make short straight stitches with your needle and thread. I used a single thread for stitching.
Stitch about 1/4" away from the edge of the fabric. When you get to almost within 1/4" of the first corner, insert the end of your first piece of elastic. Hold the elastic in place (pin if you have to) and stitch. Add extra stitches when you reach the elastic, turn and continue down the 5" side of the mask.
When you reach the next corner, take the other end of the first piece of elastic and position it in the corner. Continue stitching with extra reinforcement each time you're securing the elastic in place.
Continue around the face mask until you reach the next corner and use the second piece of elastic. When you have turned your last corner, stitch to within about 1 1/2" from your starting point. You need to leave an opening to turn the face mask. End off your stitching by adding a couple of reinforcement stitches.
Turn and Press
Your hand-sewn mask will be a little easier to stitch if you press after you have turned it. Turn it gently so as not to pull out your stitches. Tug gently on your elastic to make sure it is secure. Make sure the raw edges of the open area are tucked to the inside of the mask when you press it. It is not necessary to close this opening as yet since the topstitching that you do later will close it.
Make Tucks
Make one or two tucks in the hand-sewn face mask by folding the material over on itself. Make sure the tucks are going in the same direction on each side. Pin in place.
Topstitch on the right side of the fabric. Stitch all the way around the mask about 1/4" from the edge. When you stitch across the tucked areas, it will be harder to get your needle through. A thimble on your finger will help, but you can also put your needle through the fabric from the top and pull it up through the bottom if you are having difficulty getting the needle to go through. It may not be as neat this way, but you are assured that you are sewing through all thicknesses of the cloth.
Also, when you are stitching through the elastic, reinforce by adding extra stitches.
Go around the hand-sewn face mask twice with stitches about 1/4" from the edge. Do another round of stitching very close to the edge. This may be overkill, but it will make your hand-sewn mask less likely to come apart. You can also do an overcast stitch at the tucks on the outer edge just to reinforce them more also.