on all orders over $99
U.S. Orders Only (lower 48 states)
on all orders over $99
U.S. Orders Only (lower 48 states)

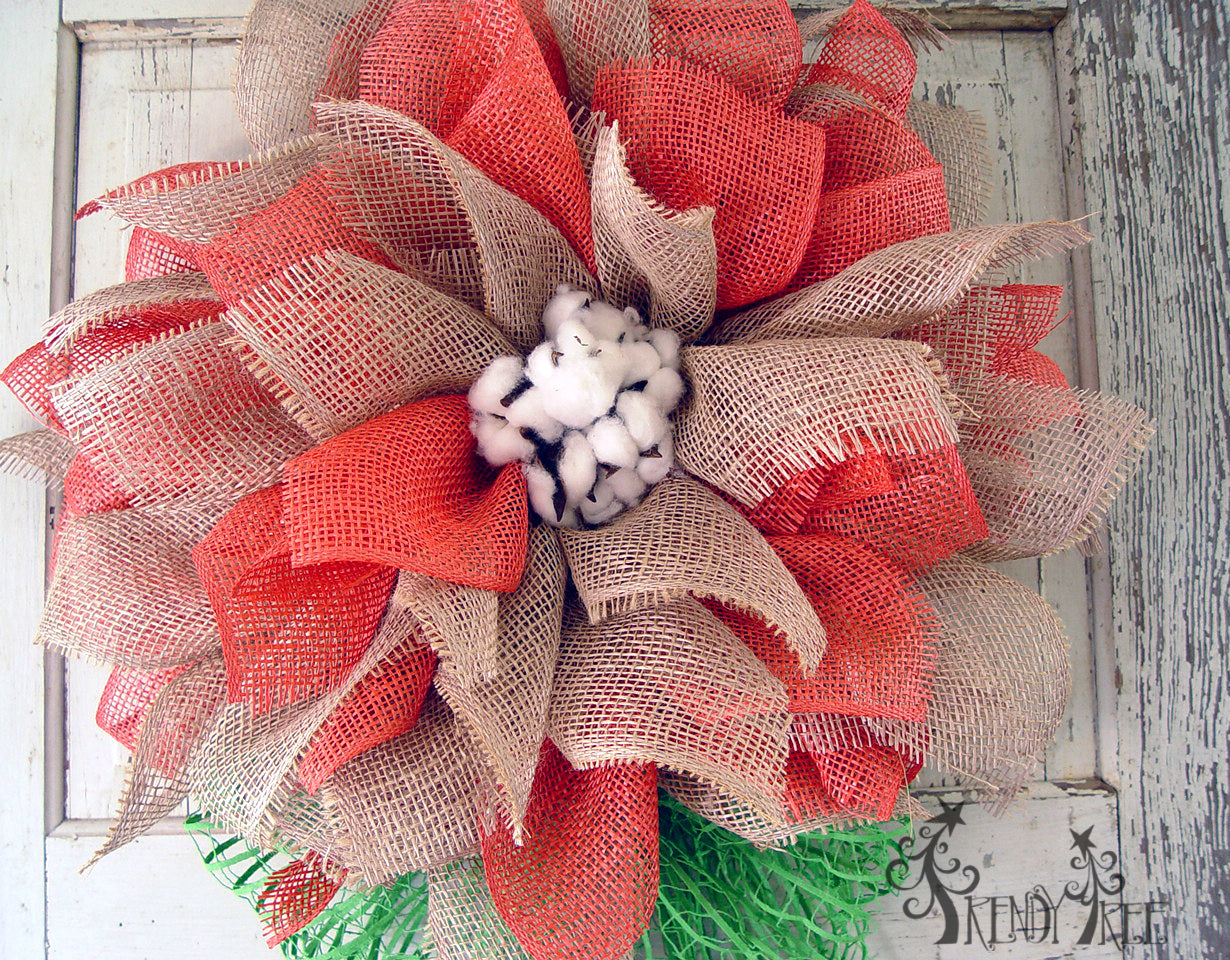
 New flower tutorial using Natural Poly Jute Mesh and Persimmon Poly Burlap Mesh. Here's the supply list:
10/11/15 Update - Poly Burlap Persimmon and Watermelon are no longer available from the manufacturer. But the project can be made using other colors: Click here to see other Poly Burlap. When items are sold out or no longer available, you can substitute other styles of mesh or colors of wreath. Just stick to 10" wide products for flowers. It is not advisable to split a 21" width of mesh since the more cuts you make in the mesh, the more raveling you will have.
 10" Burlap Pencil Wreath XX1678W4
 Also, the 10" Burlap Pencil Wreath may be temporarily sold out right now, but you can use another color. A good substitute is the 10" Twig Wreath. It's a little harder on the fingers since it has a rough mossy coating, but it is hidden well within the wreath.
You may find it easier to watch the video first and then review the instructions below. Let's get started!
Cut Mesh Strips: The first thing we did was cut 10" lengths from the Poly Jute mesh and Deco Poly Mesh.
We use a 24" x 36" self healing Omnigrid Cutting Mat and a 45mm Omnigrid Rotary Cutter (these are available at Amazon and we have included our affiliate links.)It's best to count the number of twists on your wreath to determine how many pieces of material you will need. You don't want to cut to many for sure. One piece of 10" x 10" poly was used to make a petal and we applied two layers of petals to each twist. Plus, you will need extras to fill in the center.
10" Pencil Wreath: Smooth out the twists on the Pencil wreath and take a couple of pipe cleaners, or chenille stems to make a cross-hair in the center. Attach the pipe cleaners to one of the straight posts on the wreath to secure it well.
Petals: Take the 10" square piece of mesh and lay it down to where the edges curl upward. Bring two opposing corners to the center and then pinch up the petal. Start on the outer ring of the wreath and place the petal with edges turned under, secure with the twist giving it a couple of turns. Push both ends of the petal toward the outside of the wreath. Continue around the outer ring placing the petals in alternating colors.
Once the outer ring has been completed with one layer, go back and place a second layer by opening the twist and laying the second petal down on top of the other and securing with 2-3 twists. You can push the ends of the twists to the inside of the wreath at this time to hide the tips if you wish.
Once the outer ring has been completed, move to the center ring and place two layers of petals.
If you have any noticeable gaps in your wreath after the two layers have been placed, just secure another petal by attaching it to the wreath using a chenille stem. You can do this by cutting the chenille stem in half, and placing in over the center of your petal in a "staple" fashion and secure it directly to the wreath frame.
Place another layer of petals using the "staple" method in center, attaching the petals to the cross-hair you created with the chenille stems. It may only take a single layer of 4 in the center, it just depends on the product you are using. If it isn't full enough, just lay down another layer of petals.
Cotton Boll Center: Take the Cotton Boll spray and snip several of the cotton bolls off leaving enough of a stem that you can hold in a bouquet fashion. Use a piece of floral wire to hold them together and insert into the center of the wreath, securing the bunch to the chenille stem cross-hair.
At this point you can leave the wreath as is, or add some greenery or bow. We used a piece of green open weave mesh that was a scrap on our table and just made a bow and secure it to the Work Wreath frame.
RAZ Faux Branches: We also added a "stem" to our flower by using one of the RAZ Faux Branches. These are very lightweight branches made of paper and poly foam. It was secured to the Work Wreath frame using a couple of zip ties. Please don't try to handle the wreath by holding the branch....it's much too lightweight for that))) It is for appearance only.
{"one"=>"Select 2 or 3 items to compare", "other"=>"{{ count }} of 3 items selected"}