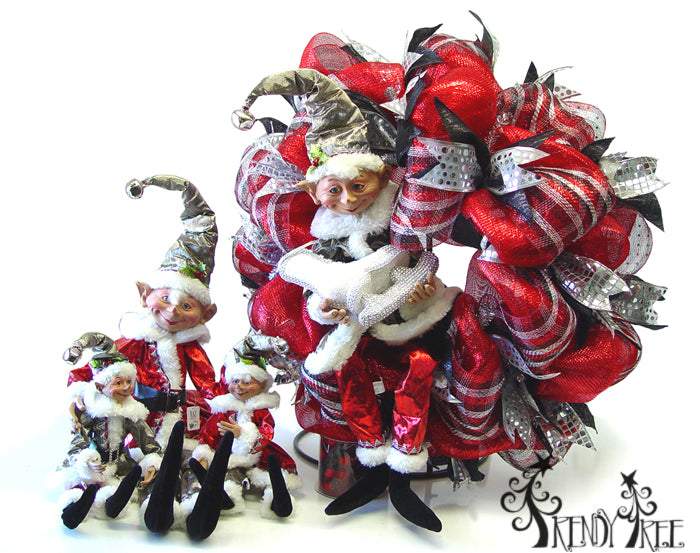
Wreath tutorial we created this week using elves from the RAZ Silver Bells Collection. This was a fun wreath to make and we had some extra "elf" help as you will see in the video)))
The RAZ Silver Bells collection is an assortment of decorations in red, black, silver, and white. There are two styles of elves from this collection, the one you see above (which also includes an 11" size that we didn't show in the photo) and a set of Skating Elves with coats and mittens on.
The red, black, silver colors were very prevalent at market this year and you'll also find those colors in the RAZ Aspen Sweater Collection....now on to our wreath!

Click Image to see Video at YouTube
We began with a basic red wreath that was made on a 24" Silver Pencil Wreath (XX751126) out of 21" Red Deluxe Metallic Mesh (RE105324).

A few days ago we created a video demonstrating how to make a basic wreath using the pouf technique. Click on the image below to view this basic wreath video.

Wreath Tutorial - Basic Pouf Technique

Supplies - 24" Silver Pencil Wreath and 21" Deluxe Metallic Mesh

I didn't take a lot of photos during this tutorial, and you'll be able to see more on the video, but we took this 6" all foil mesh of red, black and silver and started another layer of mesh right on top of the red poufs.
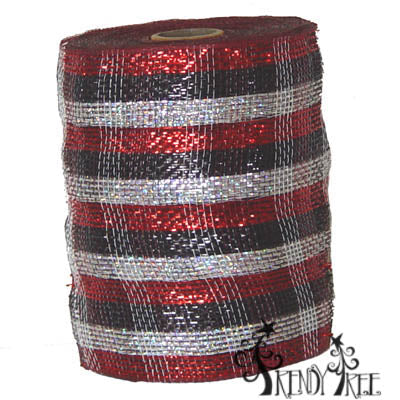
MR81211 6" x 20 yards
To start this mesh, just open up on of the twist, grasp the mesh 3-4" from the end, pinch it together and place between the twist right on top of the red pouf. Be careful that your pouf doesn't move out of place and give the twist a couple of turns.
Measure about 14" of the 6" mesh (don't cut) and grasp, pinch it together and secure in the next twist. It will be laying right on top of your red layer. You want to make sure it's not a shorter length than you red layer or it will too tight.

Just continue around the wreath completing the inner layer, then the outer. It doesn't matter if you start on the inner first or the outer.

This is the wreath after the 6" mesh had been applied to the inner and outer ring. You can secure the beginning and cut ends of the mesh to the wire work wreath frame using zip ties.

Next we chose an assortment of ribbons to use on our wreath and the first one is a Black Glossy Print ribbon that measure 4" x 10 yards. It has an animal like pattern which isn't really visible in the photo, but it shiny and the same on both side. It's a wire edge ribbon.

X00437-10010-0026
To cut ribbon strips, you first need to determine the length you need and you can do this by measuring the depth of your wreath and cut your ribbon strips a few inches longer that then depth. The depth of our wreath was about 10" so we cut the first strip 12" and did a test with it. It's always good to test your first ribbon strip before you cut up your ribbon lest they be too short or too long. You want your ribbon strips to stick out a couple of inches from the wreath. And it just all depends on what look you're going for of course. You can also make loops...or bows to add to your wreath.
We checked this first strip and it was a little short, so the next one was 14" and it looked better. To finish the ends of the ribbon you can just cut at an angle or you can do a chevron cut by folding the ribbon in half lengthwise and cut the end at an angle.

Cut from the folded side.


Once we had our correct length needed, we chose two other silver ribbons to use on the wreath. The one in the middle is a
Sheer Silver Dot (RW490485) and one with
Silver Squares (RW574126). The silver ribbons are both 2.5" in width and 10 yards in length.
To secure the ribbon strips, just pinch the ribbon together in the center, open up your twist all the way down to the last layer of mesh which was the red/black/silver on this wreath and lay the ribbon strip down face up. Now you are ready to secure the final twist with 3-4 turns.

Some of the ribbon strips were layered using a silver strip on top of a black strip. Typically we would have put a layered black/silver ribbon strip in every twist....but we were a little short on black ribbon strips. We had previously used ribbon off this roll, otherwise there would have been more than enough. Course on the finished project....it's isn't noticeable.

We used one of the
30" Silver Bells Elves (3302534) and secured him with wire to the frame. Our projects are not made to be permanent, but you surely wouldn't want an elf like this to fall off! So secure him in a couple of places using floral wire, pipe cleaners or something similar. Secure him to the wire frame itself.
For this wreath we also placed a R
AZ Ice Skate Christmas ornament (3303498) which is light as a feather in his hands.

RAZ Silver Bells Elf 3302534

RAZ Silver Bells Elf 3302534
Here are more suggestions of items from the RAZ Silver Bells Category that would look nice on a wreath like this:
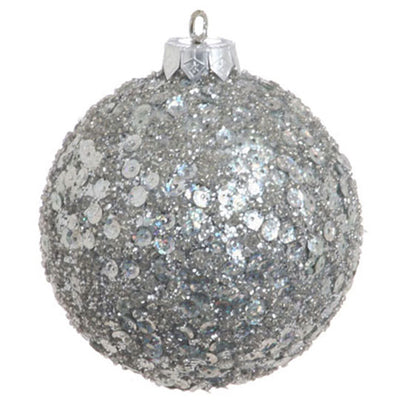
RAZ Silver Beaded Ball Christmas Ornament 3100044

RAZ Silver Tinsel Bell 3329706
Love this old fashioned look bell)))

RAZ Silver and Black Beaded Spray F3302530

RAZ Jingle Bell Garland G3319029
This Jingle Bell garland would make a merry sound each time the door is opened or closed)))
There are more items in the RAZ Silver Bells Collection and great red/black/silver/white items in other categories too.
We have several styles of mesh that would look great with these items....from solid wide foil reds, black, and silver or even a red/black stripe.

21" RE1014W8
This red/black foil stripe is also available in a 10" width RE1314W8
Here's another good color choice....you could really add lots of red to this one along with some silver. The black with thin red stripe would make a great background (TDN70245).

Deluxe Black Thin Red Stripe TDN70245
Stay tuned for more tutorials coming up!