Cream Pumpkin Tutorial
Supplies: (Click here for list of products all on one page)
-
XX758250 12" Work Creations Ball Iridescent White (Silver shown in video, but white recommended for this mesh)
-
RE100083 21" Cream White Two Tone Deco Poly Mesh
-
860531 4" Sage Green White Polka Burlap Ribbon
-
RD106104 Wire Jute Roping Brown
-
RA0002J8 2" Wired Paper Ribbon Brown
- Green 10" mesh, burlap, or other material for leaves
- Chenille stems
-
FH7596 18" Cottonboll Spray with Rusty Bell
-
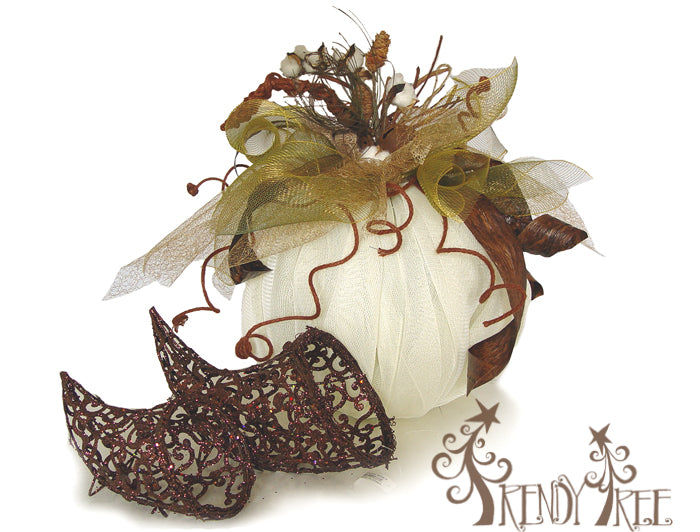
KG2916 Glittered Metal Twig Cornucopia (shown in photo above)
Set up Work Ball
This pumpkin was created using a 12" Work Ball. You could also do the same thing using the 12" Half Work Ball which would be flat on the back and perfect for hanging on a door or wall.
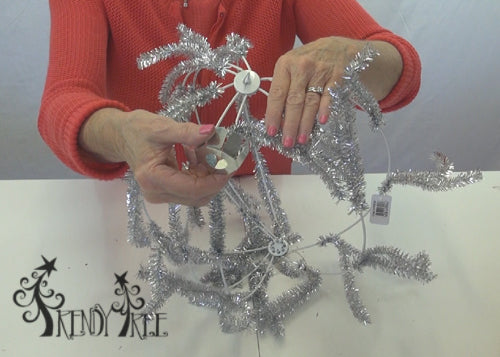
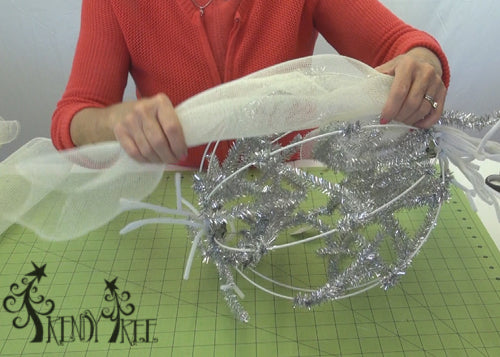
Spread out ribs of Work Ball and place metal cap over the top, fitting the ribs into the slots and bending the slots to the inside. Apply same type of cap to bottom of ball.
You won't be using the twists attached to the ribs so just tuck them to the inside, or snip them off. We used a silver ball on this pumpkin, but a white would have been a better choice.
The rolls of mesh need to be attached to the very top of the pumpkin so add chenille stems for twist ties to each rib if there isn't a silver twist in the right place for this project.
After you have the chenille twists in place, you can keep them from sliding around by connecting them to a twist tie on the opposite side.
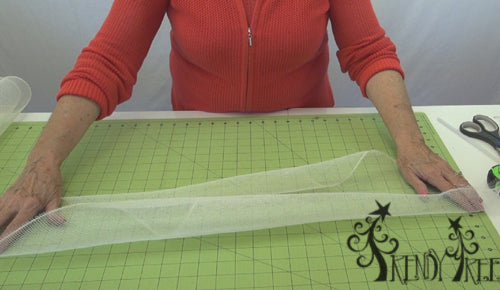
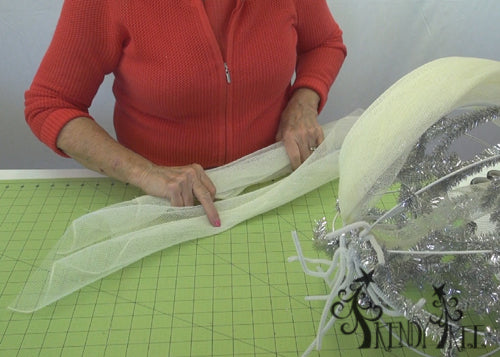
Cut Deco Poly Mesh Strips
We used a Cream and White Two Tone mesh with no foil. Strips were cut in 20" lengths. It took almost the whole roll of mesh to cut 16 strips. Two strips of mesh were used to cover each rib on the work ball.
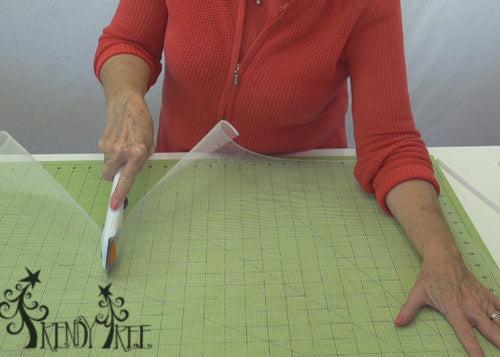
Lay a mesh strip flat and pull the corners gently diagonally. It will start to curl up on the side.
Roll the corners to the center from both sides. This will be the "wrong side" of the mesh. This is the side that you will want touching the rib, leaving the "right side" or smooth side facing outward.
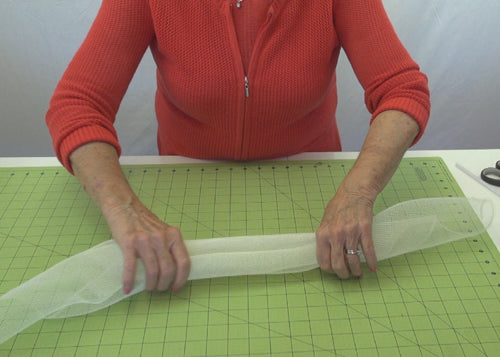
Inside with folds
Outside or right side
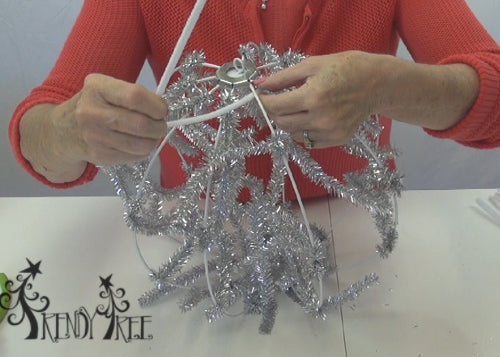
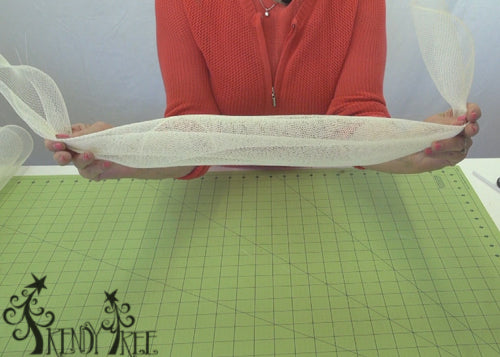
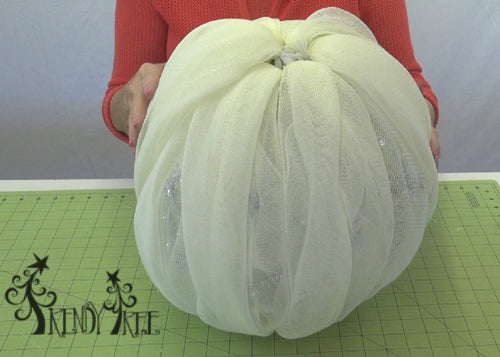
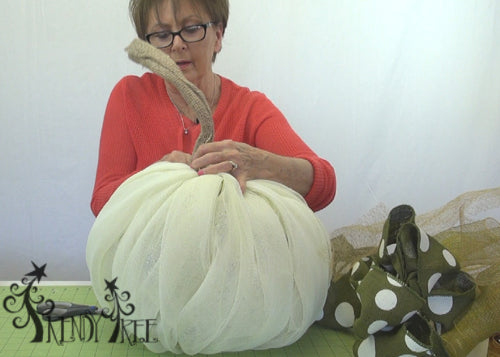
Attach Mesh to Work Ball
Start by holding the strip of mesh at the lower end with the "right" side of the mesh laying flat on the rib. Attach to one of the twists at the top of the ball.
Once attached, bring the mesh roll back over the rib. This will cover up your attachment and leave you with the outside (right side) of the mesh facing out.
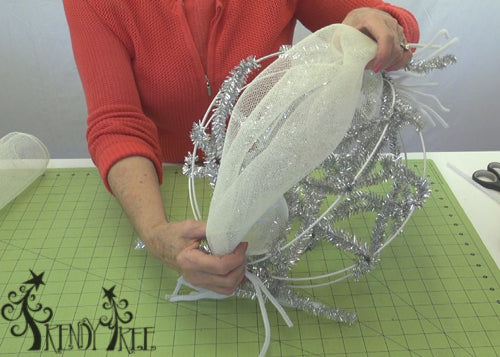
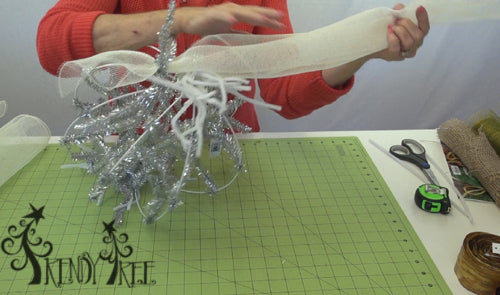
Tuck the bottom end of the roll to the inside of the ball and secure with the chenille stem from the inside. This will allow the ball to sit flat.
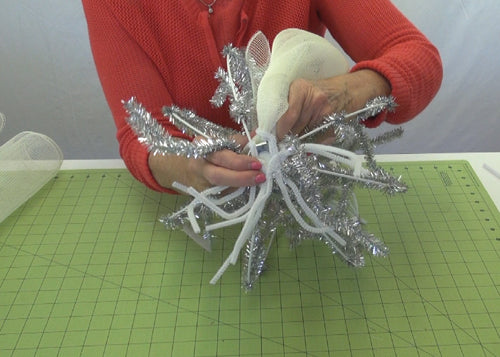
Attach two rolls of mesh to each rib. To attach the second roll, undo the twist and re-secure.
It really easier to attach two rolls at the same time, but just harder to hold.
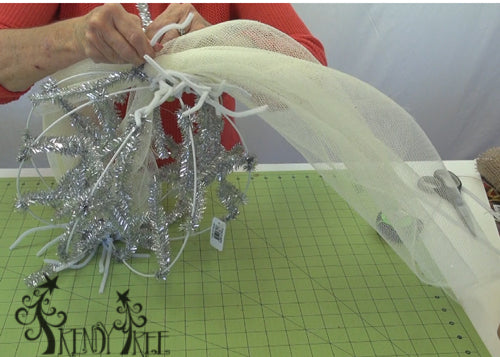
Attach by holding the rolls at the lower end, laying the right side down on top of the rib. Secure with the twist and bring the two rolls over the rib, covering up the attachment.
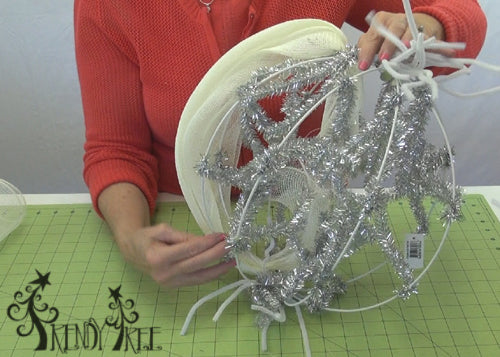
Ends are tucked to the inside, chenille stem secured and tucked to the inside. Continue around the Work Ball until every rib is covered.
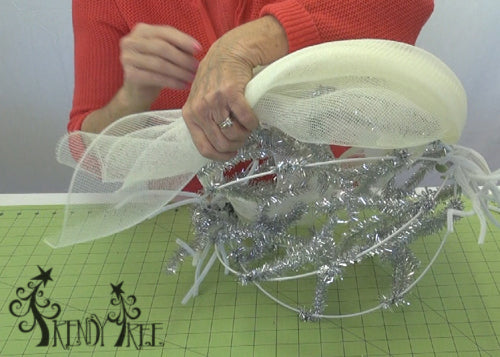
As each rib is covered, you may have to adjust your mesh here and there, tuck your sides in etc. The silver twists are showing a little so we went back and snipped them off. In hindsight, we suggest you use a White Work Ball when using this color mesh, unless you're using a heavier or thicker mesh like the Vertical Line which would give better coverage.
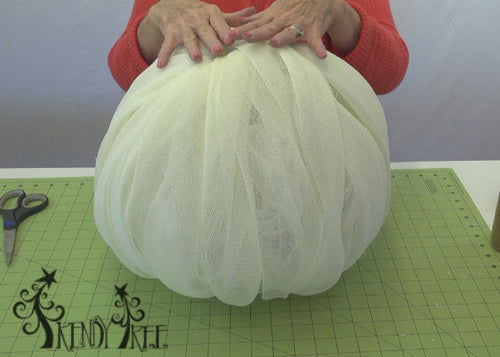
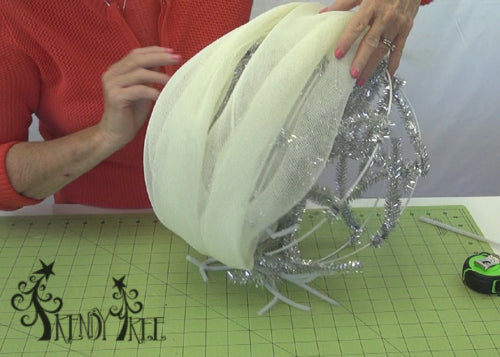
This is our pumpkin after the twists had been snipped and now it's ready for a topping.
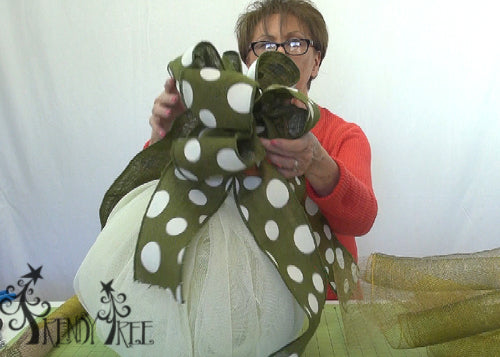
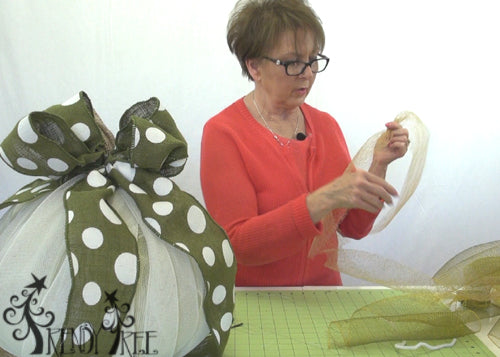
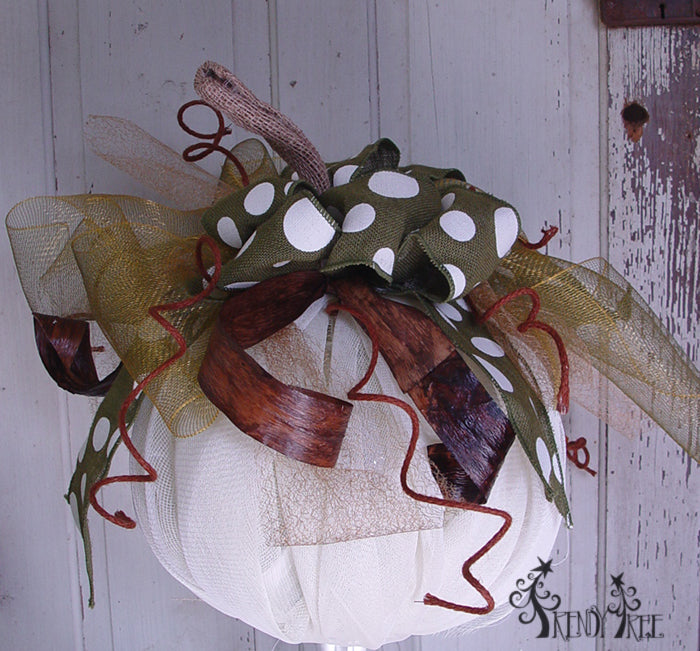
Make a Bow
We made a simple loop bow out of the 4" polka dot ribbon. Our plan was to make the bow, stem and jute streamers all on one attachment and insert the topping all at one time. But the burlap bow was rather bulky, so we made the bow and set it aside.
 Make a Stem
We used a scrap of poly jute from our craft table, you could use any number of materials to make a stem.
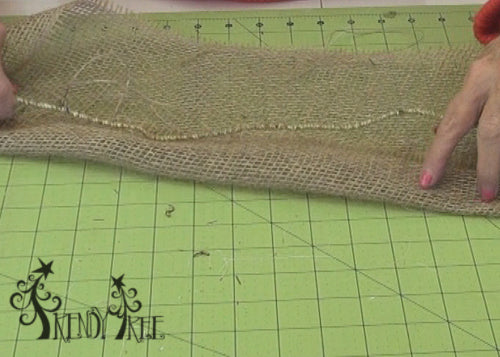
We wanted to be able to shape the stem, so we folded the burlap over a piece of Glitter Twig Garland that had the twists snipped off it. The Glitter Twig Garland is great for all sorts of projects. The wire is heavy enough to hold it's shape well and is flexible.
We just folded the raw edges to the inside and sealed with hot glue.
We removed the bow from the pumpkin and inserted the stem into the top of the Work Ball.
Then the bow was attached using a zip tie and was secured to the ring at the top of the pumpkin.
Makes Leaves
We cut strips of 10" green/gold mesh into lengths 18" to 24" and also some 6" Antique Gold Cosmic Twist for a little different texture. You could use any sort of scrap green material for leaves, or burlap.
Just pinch the lengths of mesh in the center. We held about 3 pieces in used a wire twist (ones that had been snipped from the Glitter Twig Garland) and twisted it around the center of the mesh making a sort of "pick."
These leaf picks were inserted in the top of the pumpkin. You could put in as many or few as you like.
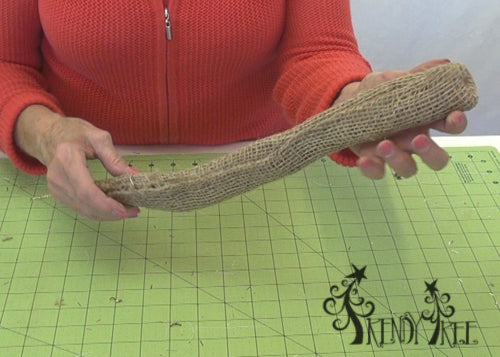
Jute Roping
Lengths of jute roping was cut and curled around a cardboard roll. Then using a piece of wire around the center of the roping, making a "pick" in the same fashion as the leaves. Tuck the roping pics into the top of the pump. You can re-shape the curls easily.
Paper Ribbon
The last thing we added were strips of the Brown Paper Ribbon. This ribbon is 2" wide and wired. It's thick and shapes well. It also was pinched in the center and a wire used to make a pick and inserted in the top of the pumpkin.
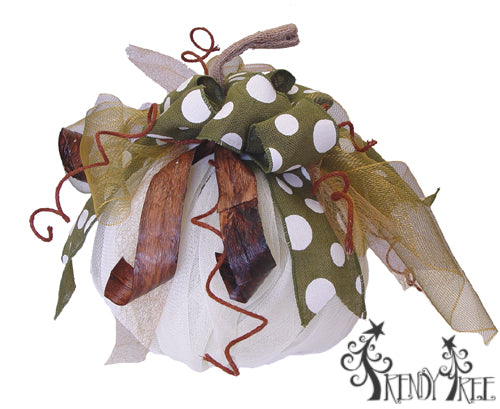
Once you have all your materials inserted, you can go back and trim the leaves as needed, curl your roping and ribbons. We cut the end of the polka dot ribbon chevron style.
 Alternate Topper
We removed the Polka Dot Bow and stem and created another stem just using the Brown Jute Roping. Some folks don't like to use a hot glue gun and this stem was just as easy to make if not easier.
A length of roping was cut and just fold a couple of time, then the tail of the roping was used to just wrap around the piece until we had it close to an inch in thickness. The Jute Roping is wired so it was easy to shape. It was secured to the top of the pumpkin with a couple of zip ties which were easily covered up.
We then used a new Cottonboll Spray with Rusty Bell pick as a topper instead of the bow. The Spray has rusty bells, pinecone, burlap, metal strip and pine spray.
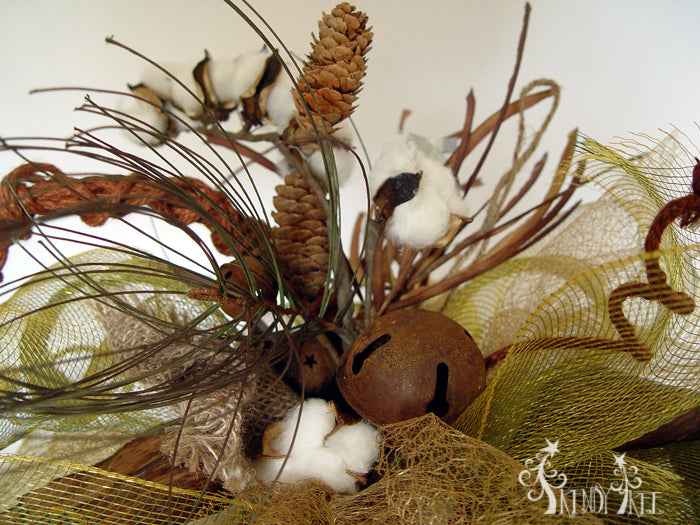
The Glittered Metal Twig Cornucopias just really seemed to go with the pumpkin and compliments it nicely.

Subscribe to our You Tube Channel!
