Deco Paper Mesh Carrot Wreath Tutorial using a Copper Pencil Rail, Copper Pencil Garland, Deco Poly Mesh and Deco Paper Mesh. Top was made using open weave Saxon mesh and jute roping.
Supply List
XX759938 Copper Pencil Rail - 1
XX742438 Copper Pencil Garland - OUT OF STOCK
(XX742937 Lime Green Glitter Twig Garland is a good substitute)
RE130220 10" Orange Deco Poly Mesh® - 1
RR800768 10" Multi Orange Deco Paper Mesh - 1
DJ70405 21" Moss Saxon Mesh - 1 OUT OF STOCK
(RE104368 21" Vertical Line Lime Green is a good substitute)
RD106132 Lime Green Jute Roping - 1 OUT OF STOCK
(RD106130 Moss Green Jute Roping is a good substitute)
Sorry, but I didn't take still photos along the way of making the carrot wreath, but if you view the video first maybe this will help.
We took Copper Pencil Rail, straightened all out the ties and opened the Copper Pencil Garland (sold out of Copper Pencil Garland, but Lime Green Glitter Twig Garland will work just as well). A piece of the Pencil Garland was attached to the bottom of the Pencil Rail in the Center,  leaving a loop on the end where one twist tie would be in the center hanging down 4-5" to make the tip of the carrot.
Note: If we're out of the Copper Pencil Rail you can use gold, green, white or burlap.
Then the straight piece was pulled up through the center of the Pencil Rail and attached at the cross bar on the top. This center strip will give more places to attach mesh for a fuller look.
That straight piece was cut off from the rest of the Pencil Garland. Another strip was cut from the Pencil Garland to form a curved shape around the Pencil Rail to give it an oval or carrot shaped. It was attached on both sides toward the bottom of the Pencil Rail at the 4th cross bar. The oval shaped was tapered toward the bottom where it was attached left larger at the top. 
To keep the garland from flopping loose from the rail, we added some extensions in about 4 places to make it more secure. We cut some of the twists from the remaining left over Pencil Garland, attached them to the Pencil Rail, and then to the Pencil Garland. About two coming off the top and two midway down.
This helped to keep the entire frame in one piece. You could use pipe cleaners also if you didn't want to cut the twists off the remaining pencil garland. After the frame had been fashioned, we had about a yard of the Pencil Garland left over.
After the frame was ready, we moved on to making the ruffles. Most of the time when we're making a  wreath using the ruffle technique, we do at least two layers of ruffles.
You can cut back on expenses a bit by using a less expensive product to make that first layer of ruffles so we chose a 10" Orange Deco Poly Mesh. This is the plain deco poly that has no foil.
To make the first layer of ruffles, we cut strips of mesh 12" in length. I said over and over on the video that a 10" yard roll of mesh would yield 36 strips cut at 12".....WRONG....my math skills are lacking.....it would only yield 30 strips. You can count the number of twist ties on the frame, I think after we had tied in the garland, we had about 28 twists to cover. So we cut 28 pieces of mesh.
Once the strips are cut, lay the mesh down flat. It will tend to roll up, lay it where the edges are turned under instead of upward. Scrunch up through the middle o the mesh starting at your cut edge (having selvage edges to the sides). Scrunch up the mesh and keep it pinched in your hand. Place the ruffle in the twist and turn it about twice. No need to secure really tight with 3-4 turns at this point because you're going to add another layer on top of this.
Cover all the twists with your layer of Deco Poly Mesh® ruffles. It will look thin and you'll be able to see the frame through it, but don't despair, another layer is coming)))
Here's a link to a basic ruffle wreath we did using poly/burlap mesh. The technique for making the ruffles is the same. Click Here.
Next we cut 28 of the Deco Paper Mesh ruffles using our Multi Orange Paper Mesh. The paper mesh is of course, made of paper. It does have a protective coating sprayed on it, to help with moisture, but it is not water resistant like the Deco Poly Mesh® which is made of plastic.
You might want to use creations done with paper mesh inside, or in a very well protected area away from wind and moisture. I love working with the paper mesh, it does ravel some as does any of the poly products, but it has great texture and is thicker. A layer of paper mesh gives you more coverage and body.
The multi orange mesh has several shades of orange, some yellow, cream and a darker reddish orange. It is also available in a 21" and 4" width. Folks are always asking if they can use 21" products and split down the middle to make 10" ruffle widths. You can do this, but you'll be dealing with more raw edges, and more raveling. Certainly in a pinch if you needed a few more ruffles and had some 21" on hand, I would use it. But I wouldn't start a new project with it unless it was a trial or something I was just making for myself etc.
The multi orange was cut in the same way as the poly, 12" strips, scrunched and pinched making the ruffles.
We use a 24" x 36" self healing Omnigrid Cutting Mat and a 45mm Omnigrid Rotary Cutter (these are available at Amazon and we have included our affiliate links.)
To attach your second layer of ruffles, open up a twist and lay the paper ruffle down on top of the poly mesh ruffle and re-secure the twist. This time you can give it 3-4 twists since this is your last layer. It's important to open those twists, leaving the previous ruffle in play and lay the new one down, you might turn it a little differently instead of laying it in the exact same position.
Just continue placing your paper ruffles in every twist. Once your creation is done, if you see a gap that needs to be filled and perhaps there is no twist there, you can just fashion one out of a chenille stem, or cut one of the twists off the remaining pencil garland and secure that ruffle.
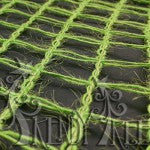
Moss Green Saxon was used for the green top of the carrot. The Saxon mesh is also a jute or cotton product that has some texture and stiffness to it. It has a nice large open weave. It comes in 21" x 10 yards and we only used a few yards off this roll for the greenery.
Strips about 16" - 20" in length were cut, rolled up loosely, pinched in the center and attached to the top twist that was in the most center position. If you frame doesn't work out that way with a center twist, you can make one. Rolling up the mesh and pinching in the center is a "curly" technique that is used for wreaths. Sometimes you might use this technique for your entire wreath, but it does make a large finished project. You also could pinch in the center, or off center to make the curls for the carrot different lengths. We pinched these in the center.
Note: If we're out of the Green Saxon, you can use any color Green Paper Mesh, or Deco Poly Mesh to make the curly top. Vertical Line Green would work well with it's nubby texture.
Another good substitute for the green top would be the Open Weave Burlap Net ribbon. This product is wired and available in a couple of shades of green - QXB330110-09 Lime Green and QXB330110-08Moss Green.
After the first five were added to the one twist, we added in two more on each side to give it more fullness. There was no twist in these areas, so we fashioned one using twists from our remaining piece of pencil garland.
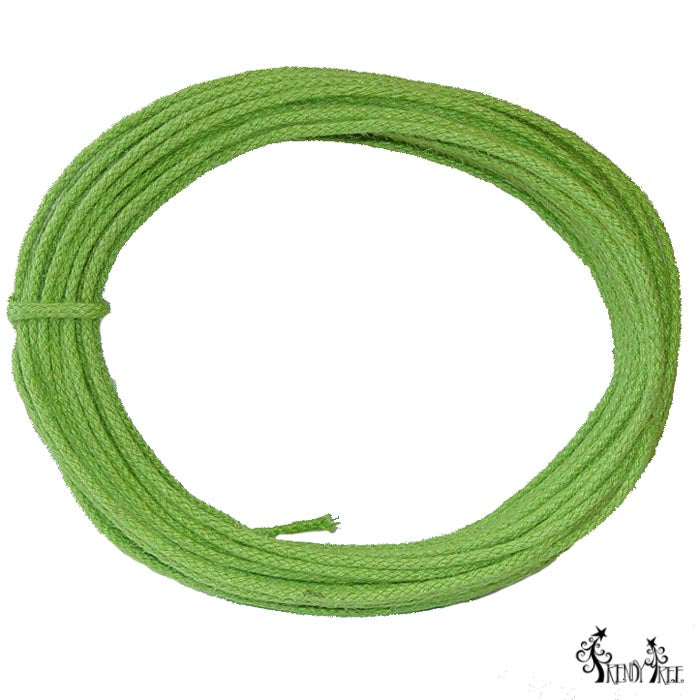 The final touch to the Carrot Wreath was the Lime Green Jute Roping (We're out of the Lime Green roping, but Moss Green will work just as well). This roping is available in several colors and comes in 25" lengths. We only used maybe 3-4 yards of the roping so you could get several projects out of a roll. It is wired and covered in jute.
We cut strips varying in length from about a yard to 3/4 of a yard. To make the curl effect, we just wound the roping around a cardboard tube that came out of a roll of mesh. Just wrap it around the tube, and slide of the end. It just makes a neat curly piece that you can play with))
The roping pieces were attached in a twist just like we attached the ruffles and greenery. Open the twist down to the last layer and place the roping in the twist and re-secure with 3-4 turns. In a couple of places we clumped about three roping curls together, secured them together first with a piece of the tinsel twist from the left over garland, then secured them directly to the frame using another piece of tinsel twist.
It's always smart to turn your wreath over and check the back once you're done. Look for sharp edges that might scratch the wall or door. Turn them to the inside and if you find something you can't fix, cover it up with a little piece of cloth tape or duct tape.
The finished Carrot Wreath measured about 38-40" in length and 18" in width. We hope you will watch the video and subscribe to our YouTube channel))