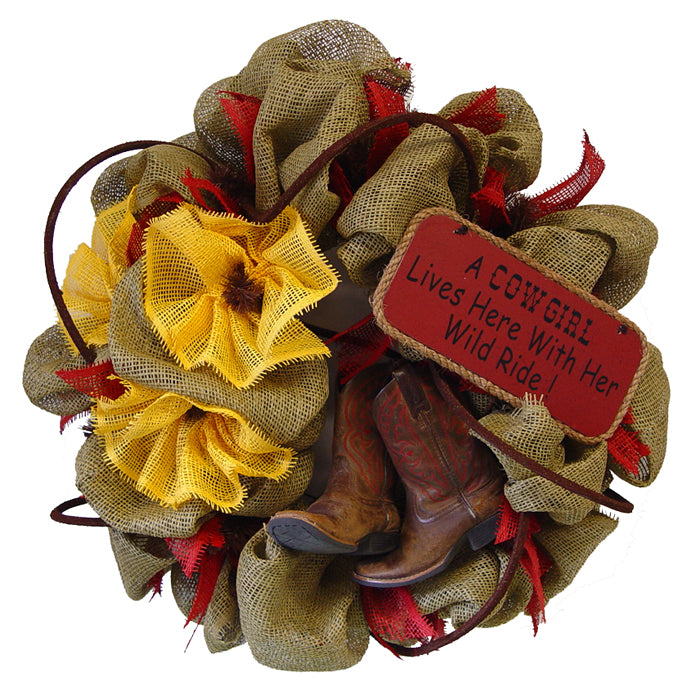
We all have items that we want to keep and this little pair of cowboy boots was one of those things. What better way than to secure them to a wreath with a western look to go on the wall in a little cowboy's room)))

Since this wreath was going on an interior wall, we chose a
Moss Paper Mesh. This is paper mesh is 20.5" in width and 5 yards in length so it took two rolls to go around a Chocolate Work Wreath. This paper mesh has a burlap look, but is made of paper. It does ravel a bit and the more you handle it, the more strings you will have to cut.
This wreath would have done equally well and weathered the outside if it had been made of

Poly Burlap which also has a burlap look, but made of synthetic poly. It is 21" in width and 10 yards in length so one roll would have worked for a wreath like this.
We chose the
Chocolate Work Wreath this time instead of a Pencil Wreath so that a bit of the chocolate color would add to the wreath.
The work wreaths we have at Trendy Tree are 24" wreaths. The metal frame actually measures 15" but with the twists and by the time you add your material, your end result is a wreath that measures 24" or larger. The overall measurement of this wreath turned out to be about 28" to 30" inches in width. Now lets get started!

To start your wreath, lay the work wreath down flat and smooth out all the twists. We started on the inner ring first but it doesn't really matter if you start on the inside or outside ring. Grasp your mesh about 3-4" from the end and pinch it between your fingers, place it in a twist and secure it with a couple of turns.
The beginning 3-4" of the mesh can be pushed to the inside of the frame for now and we will secure it before we finish the wreath.

For this wreath, we measured the poufs about 14" and used our cutting mat to measure. You can use a yardstick and just measure from your last twist.

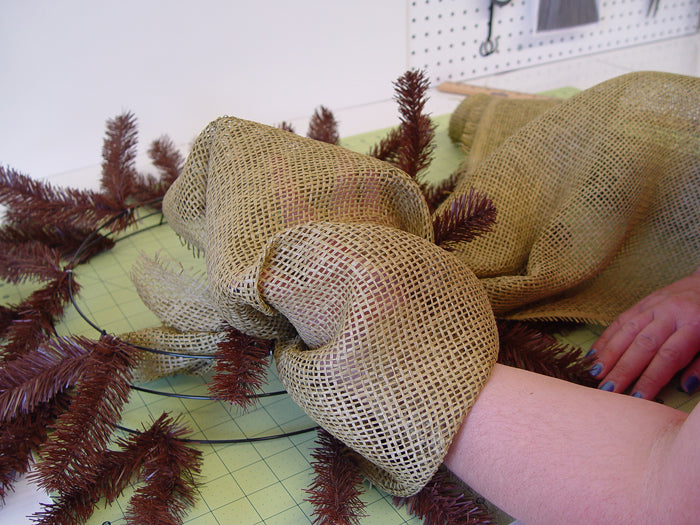
Secure the pouf if the next pair twists and give it a couple of turns. Continue working around the wreath in this manner until you have a pouf in every twist. Place your hand inside the pouf to fluff it out a bit as you go, keeping an eye out that your poufs are all about the same size. If not, you can undo the twist and adjust as needed.

The wreath now has the inner ring completed. You can see it took almost one entire roll to complete the inner ring, but remember this particular paper mesh was only 5 yards in length.

To move down to the outer ring, pull the mesh down snugly to the closest twist on the outer ring and secure.

Push the poufs toward the center to get them out of the way a bit and start your pouf on the outer ring. Grasp, pinch and measure at 14" and continue around the ring. At some point you will use up the first roll and have to tie on the paper mesh from the second roll. You do this the same way as starting a new roll in the beginning, just make sure you have a pouf for between every twist.

This is the wreath with both the inner and outer rings completed. We had just a bit of paper mesh left over.

Cut the paper mesh leaving about 4-5" of a tail.

Turn the wreath over and take the tail, pinch it together and weave it in and around the wire frame.

Secure the tail around the frame with a plastic zip tie. Zip ties are made of plastic, but keep some wire cutters handy so you won't ruin your good scissors (or learn by experience as I have). Snip the zip tie off closely and turn the rough edge inside. Always check the back of your frame for rough edges. You don't want to scratch wall or doors. Secure your beginning tail the same way.

We chose this 10" Yellow Paper Mesh as contrast for our wreath to give it a summer look. This is a deep egg yolk yellow which is great for fall too. Our initial thoughts were to go on top of the 20.5" moss paper mesh with a layer of 10" but it just seemed to cover up the moss paper mesh too much and we didn't want to hide the beauty of it. So we elected to just use a bit of the Yellow Paper Mesh and add some contrast with the ruffle technique.
We use a 24" x 36" self healing
Omnigrid Cutting Mat and a
45mm Fiskars Rotary Cutter (these are available at Amazon and we have included our affiliate links.)
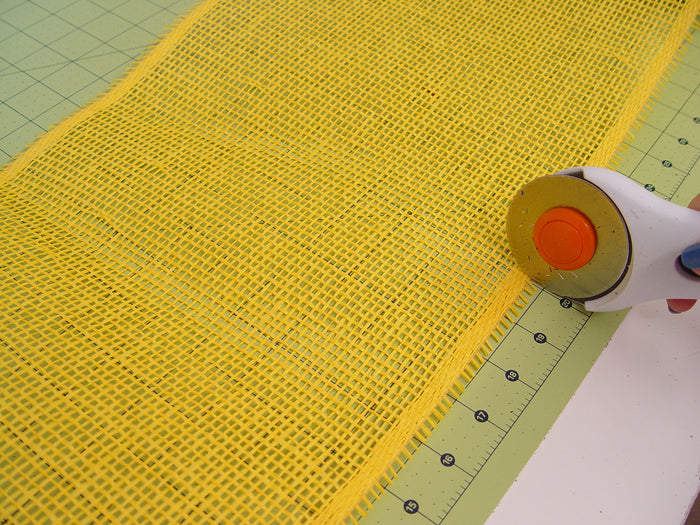
Lay your mesh out flat and cut 20" lengths.

We folded the outer edges about 1" to see if that would help with the raveling and it did.

Starting in the center of the mesh, pinch pleat or gather in your fingers all the way down the 20" length.


Hold it pinched in your hand and open on the twists on the wreath. We decided to place three of the yellow ruffles in the upper left area of the wreath.
Usually we say undo the twist, leaving the first layer of paper mesh or other material in place and lay the ruffle on top of that and secure all the layers back together with 2-3 turns. But for this wreath and the type paper mesh we had, it squashed down the mesh too much to secure the contrast in this way.
So, the yellow contrast ruffles were secured with the tips of the twists instead and this let the ruffles lay right on top of the wreath.

Our next contrasting color was this Red Paper Mesh 4" x 25 yards. We cut 14" strips and still had quite a bit left over from this roll.

The ribbon was folded and the ends cut from the folded side to make a chevron or fishtail finish.


Pinch the 14" strip in the center, open the twist and lay the red paper mesh strip on top of the moss paper and re-secure with 3-4 twists. Now that this is the last layer to our wreath, we secured it a bit more than the initial 2 twists.

We needed to add just a bit of red to our yellow contrast, but didn't have a twist to secure it with, so we just made one with a pipe cleaner and secure it to the frame of the work wreath.


The next thing we added was the Brown Moss Roping. This roping is thick, wired, and comes in 25" lengths. It helps to roll the roping up in a circular fashion before you get started. It will have some flaking when you handle it but really adds a nice texture to your wreath. Lariat style roping would look great on this wreath too.
Just attach the roping to the frame of the work wreath or, in one of the twist and let it wind around the wreath, attaching here and there.......you don't need to attach it in too many places. Sometimes you might need to give it another turn or two.
 The next thing we chose was one of the new Horse Signs that just came in. Since we have a little cowboy, we chose the blue one.

This new Welcome to Horse Country slate sign would look great too.
Lastly, we added the most prized item....the cowboy boots. We didn't want to do anything to damage them, so they were secure with clear fishing line and tied to the metal frame. They rested nicely on top of the mesh and we were able to position them there.

Suppose we could have polished them and made the scuffs look better.....but hey....we had to fight him all afternoon to keep the boots on the wreath!! He just knows he can still wear them!


Here's our cowboy......part Superman....cowboy on this day.......boots on the wrong feet no less...lol
Some bandana style ribbon or even real bandanas would be cute on this wreath. We'll probably put one on his old cowboy hats on the wreath once it's on the wall and maybe some things like spurs....handcuffs.....but I wouldn't be surprised if those things are mysteriously removed.
Save