Make a Big Loopy Bow with One Ribbon and the Pro Bow Bowmaker
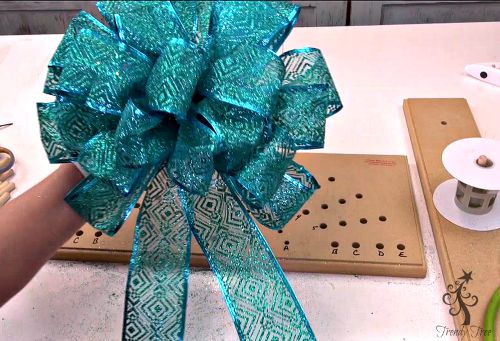
Make this BIG loopy bow using 1 roll of 2.5" x 10 yard ribbon and the large Pro Bow bowmaker.
Yes, you can do it!
Bowmaking isn't always the easiest thing in the world, we understand. But there are some tools available to us, to help even the novice of bowmakers to turn out big beautiful bows like this.
This is coming from one of those people who could never get the loops to come out even....you know what I'm talking about!
Here are the steps we took to make this bow. We started with a 2.5" wire edge ribbon.
This ribbon is X441840-39 Turquoise with Teal Glitter but you can use most any style of ribbon with the Pro Bow. We did use the entire roll (10 yards in length) of ribbon.
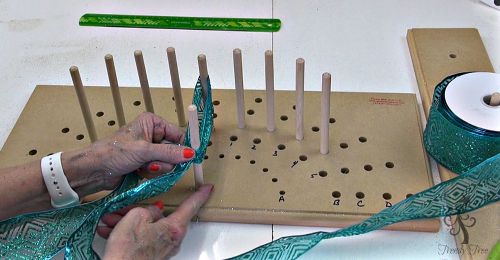
First step was to set up the Pro Bow for our bow. We are still using our old Pro Bow bowmaker and you can see where we have penciled in the letters and numbers on the holes.
The newer version, that we sell on Trendy Tree, has markings on the board for you.
The Pro Bow comes large or small. This is the large one. It includes the ribbon holder that you see on the left that will hold up to three rolls of ribbon.
There are multiple pegs included with the Pro Bow, some shorter than others. We used the longest pegs in the kit.
The "center" pegs were placed....in the center...the one in the very front, in the first hole and the other on the "C" row.
Then four pegs were placed on the "C" row on either side of the center peg. For this bow, the plan was to place three loops of ribbon around each peg.
We started with the ribbon on the ribbon holder with the ribbon coming off the right side.
Taking the end of the ribbon, the ribbon was placed around the center pegs.
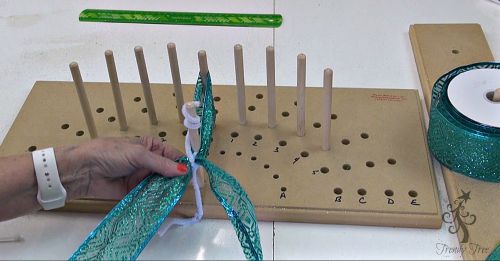
The left "tail" of the ribbon was brought under the ribbon (that is coming off the roll) and at this point you can decide how long you want your tails.
We left the tail on this one about 12 or so. The "tail" is in my left left.
You want to secure your starting ribbon to the center peg. Also, note the position of the ribbon around the peg. You want it about the center of the peg and not down at the bottom of the peg.
Just slip a chenille stem, or piece of floral wire up under the ribbon, being sure to catch both pieces and give the chenille stem or wire a couple of twists.
The chenille stem ends can be wrapped around the peg at the top and secure to the tiny nail on the front of the board. In hindsight, it might be better to secure both ends of the chenille stem on the front of the board.
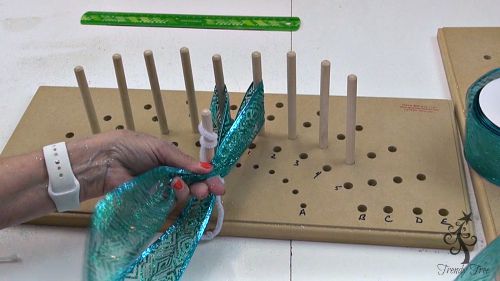
Now you are ready to start wrapping ribbon around the pegs.
This ribbon has a right and wrong side. It's important work with your ribbon's right side up.
Twist your ribbon to bring up the right side, and wrap it around the first peg to the right of your center peg where you did your starting loop.
Once you've gone around that first right peg, come back to the center, twist your ribbon to bring up the right side again, then make a loop around the first left peg.
Continue coming back to the center, twist, and make another loop around the first peg on the right. Continue doing this until you have three loops around the first right and first left peg.
Continue working in this same fashion moving to the second peg on the right; second peg on the left; third peg on the right; third peg on the left; 4th peg on the right; 4th peg on the left.
Slip a large zip tie (cable tie) under the ribbons, being sure to bring it up and out through the initial center loop. Bring it to the front of the board and secure by pulling tightly.
You won't be able to secure it fully until you slip your ribbon carefully off the board. It's probably easier to just pull the pegs out of the board and lift your bow up
Hold your bow securely until you have really tightened that zip tie all you can.
Snip off the end of the zip tie with wire cutters (doing it with your scissors will ruin them).
Bring the chenille stem ends together with a twist. The chenille stem will be used attach the bow to a wreath, package ect.
Now you're ready to fluff out your loops. Hold the bow in your hand, with your thumb through the loop and fluff at the loops with your right hand.
Sometimes you'll have to let go and use both hands, but try to fluff out all the loops starting at the bottom, do one side, then then other. Then move up to the next layer of loops, fluff out one side and then the other.
If you just start fluffing randomly it's harder to keep the loops nice and evenly spaced.....or it is for me anyway)))
Don't give up when first you fluff! You may think, this isn't going to work....but the key is in the fluffing....keep fluffing until you get it shaped to your satisfaction.
Another reason for using wired ribbon....it fluffs easier and holds it's shape. This is a heavily glittered ribbon....work on it in an area where you can sweep or vacuum up glitter....it will get everywhere.
Cut your tails off evenly or not even, however you like them. We usually put a chevron cut in the tails, or you can cut them at an angle, whichever suits your fancy.
That's it....the bow measures about 11-12" in width and we only had probably less than a foot left over. This was a 10-yard roll of ribbon.
Tip: If you're just getting started out making bows, start with wire edge ribbon, maybe sheer. Thinner ribbons are easier to work with when it comes to twisting. Get an inexpensive ribbon and try making a bow.
Then undo it and make another. Try you hand at different bow recipes. We do this all the time when trying out new styles.
Wired ribbon is very forgiving and pretty easy to straighten out and do over. Pretty soon you'll be the "go to" person when someone you know needs a bow!